Showing posts with label Appetizers. Show all posts

Monday, August 12, 2013

4 Cheese & Zucchini Stuffed Green Tomatoes

The weather has been unusually cool here for August in New York and that means we have tons of tomatoes on the vine that are not ripening, I have about 100 green tomatoes on my plants. My parent's have two whole rows of tomatoes that are big and beautiful...and green. I love fried green tomatoes they are super tangy and my mother is from the south so she grew up eating them every summer and cooking them for us in return. The drawback is that they require a lot of work and I really do not like frying things, it just takes a huge amount of oil and I get impatient. I decided that green tomatoes do not have to be lumped into one recipe category, they are a delicious and deserve to be used for other things. They are firm so they stand up to any cooking process well, but they are still tender enough to not require a lot of cooking. This tangy fruit/vegetable goes so well with the creamy and sharp filling, that is full of pungent herbs and sweet zucchini. It was a culinary revelation and I plan on stuffing them from here on out! They go perfectly with grilled meats, fried eggs or as an appetizer, we ate them along side a juicy burger...ahhhhmazing!

This recipe makes 10 stuffed tomatoes, the size of apples.

Ingredients

10 Apple size, organic, green tomatoes

5 oz Pasture raised, soft goat cheese, room temp., I used Nettle Meadow garlic and olive oil.

1/4 Cup parmesan cheese, grated.

1/4 Cup sharp cheddar cheese, grated, I used Cabot.*

1/4 Cup mozzarella, shredded, I used Cabot.*

3 Tbsp pasture raised butter, I used Cabot.*

2 Cloves organic garlic, minced or grated.

1 Small organic spring onion or large shallot, finely diced.

1 Small organic zucchini, chopped.

1 Sprig fresh, organic oregano, leaves only, chopped.

1 Sprig fresh, organic thyme, leaves only, chopped.

Handful fresh, organic chives, about 4 Tbsp, diced.

1/2 Cup homemade seasoned bread crumbs, get my recipe here.

Sea salt & fresh ground black pepper, to taste.

Extra virgin olive oil, to drizzle over top before serving.

Directions

Preheat the oven to 375 degrees F.

Cut around the stem of the tomatoes with a pairing knife and pull out the stem, with a spoon hollow out the inside of the tomato making a space large enough to stuff in a good amount, mine were about 1.5 inches.

In a bowl mix together the goat cheese, parm, mozzerella and cheddar, set aside.

Heat a saute pan over medium high heat and add in the butter, when it has melted add in the onions, garlic and zucchini, some salt and pepper. Saute till the zucchini is browned on all sides and tender, about 7 minutes. Add in the oregano, thyme, chives and bread crumbs, cook for another two minutes to coat everything and slightly brown the bread crumbs. Remove from the heat.

Add the bread crumb and vegetable mixture to the cheese mixture and mix well. Taste for seasoning and salt and pepper as needed. Salt and pepper the inside of the green tomatoes. Stuff the mixture into the tomatoes, overflowing them a bit.

Place them in a deep baking dish and fill with water 1/4 the way up the tomatoes, just above their bottoms.

Bake for 20-25 minutes or until the tomatoes are slightly browned and the filling is bubbling, pierce them with a knife to check for tenderness.

Drizzle with a bit of extra virgin olive oil over each one and serve hot or room temp.  Enjoy!

*I use Cabot products because they are local to me here in New York and 100% of their profits go back to the farmers who provide their milk.


Tuesday, July 16, 2013

Carolina Deviled Clams

These are little bites of absolute, spicy clam bliss! This is the third recipe in my vintage recipe remake collection and boy am I glad that I chose to revamp this one; frankly I am not sure why its a vintage recipe we should be eating this daily! This recipe comes from the Young Republic cookbook which spans the birth and younger years of the American Republic. Americans were enjoying independence and starting to find their own culinary style of cooking, and the southern states were a treasure trove of these American recipes. When people ask me or talk about the American culinary identity I always tend to think of southern food. Fried chicken, hush puppies, collard greens, macaroni and cheese and apple pie all come to mind. Old fashion, home cooked food that sticks to your ribs and makes you feel right at home. I know there are lots of other things that are part of the American cuisine but I have a southern mother and extended family so I grew up eating these things and they make me feel at home. I spent some time in South Carolina, about 5 years, and I love the seafood laden dishes that the state is known for; this dish is definitely reminiscent of that cuisine. I started with a garlic, celery, onion and bacon as the base for the stuffing. I then coated my homemade seasoned bread crumbs with this mixture and added a generous helping of Jojo's siracha which just put it over the top, boy was it amazing! I could have eaten the whole bowl of stuffing right there! I honestly couldn't imagine anything being more delicious, my husband and I ate 2 dozen, stuffed clams by ourselves; yes, yes that happened!

Let's talk about clams for a minute. I bought the wild US caught ones at my local co-op and those are the ones that the Monterey Bay Aquarium Seafood Watch recommends that you buy. It supports fishermen that fish responsibly and ensures that you are getting a healthy and quality product. That being said they are full of sand, because they are fished in the wild so you will need to clean them properly, or your dish will be full of grit. I soaked mine, changing the water 3 times, in very cold water with about 1/4 cup of cornmeal. The cornmeal makes the clams spit out the sand, you may still need to check them for sand after you have steamed them. I only had 3 that were still full of sand so this method worked well. You are also going to scrub them really well, with a potato brush and trim the beard if they have one, mine did not and you can ask your fishmonger to do this when you buy them.

This recipe makes 2 dozen clams, which at our house served 2.
Adapted from the Young Republic, A National Treasury of Cookery.

Ingredients

2 dozen wild caught, US clams, any kind of wild caught will work.
1 Fresh, organic bay leaf
1/2 Cup organic celery, chopped finely.
1/2 Cup organic onion, chopped finely.
4 Organic garlic cloves, minced or grated.
4 Pieces pasture raised bacon, chopped.
2 Tbsp pasture raised butter
3/4 Cup homemade bread crumbs, click on the link to get my recipe.
1/2 tsp dried, organic thyme
1/2 tsp dried, organic sage
Sea salt & fresh ground pepper, to taste.
2 Tbsp olive oil mayonnaise, I use Hellman's.
2 tsp Worcestershire sauce
1 large Tbsp Jojo's siracha, I highly recommend using a siracha or Tabasco here.
1 Tbsp fresh lemon juice
Big bunch fresh, organic chives, about 3 Tbsp chopped.

Directions

Put 2 Cups of water in a stock pot and the bay leaf. Steam the clams*, covered until they open, about 2-5 minutes. Remove from the heat and set aside uncovered to cool.

While the clams cool, cook the bacon in the butter until crispy. Add in the celery, onion, garlic, salt, pepper, thyme and sage. Saute till the vegetables are soft, about 6 minutes. Turn off the pan and add the bread crumbs directly to the pan, stir to coat them well. Remove them to a small bowl and stir in the mayo, Worcestershire, siracha, lemon juice and chives. Mix to combine well.

Prepare the clams by removing the top part of the shell, that is not attached to the clam meat, discard. With a pairing knife carefully sever the clam meat, separating it from the shell so that it will be easy to eat. Check for sand at this time, but be careful not to dump out the liquid in the shell unless you absolutely must, due to lots of grit, the liquid has a lot of flavor and keeps the clam moist. Arrange the clams, on the half shell, on a baking sheet and top each with some of the stuffing, you can be generous there is plenty to go around. Broil for 3-4 minutes or until the stuffing is a deep golden brown and crispy. Remove and let cool slightly (I actually thought they were best at room temperature).

Serve with a wedge of lemon and an icy cold local microbrew beer, they pair quite nicely with beer!

*Make sure to read the blog post above on how to clean your clams before cooking.


Heirloom Tomato & "Golden Egg" Squash Flatbread

I always make lots of pizza dough when I make it, if you are going to go through the trouble of making homemade dough you might as well make double batches. I freeze the leftover dough in small balls of dough and thaw them for weeknight meals. You can use them for pizza, cinnamon rolls or flatbread. Flatbread is a great addition to any dinner, you can dip it in soups, serve it alongside salads or for breakfast with eggs, a great way to include veggies for breakfast. This particular flatbread was inspired by some local squash I bought at the farmers market. It was called "golden egg" squash and it tastes a lot like summer squash, but without the tough seeds. The skin was soft, no need to peel, you would be able to use it in any dish that you use zucchini. It looked and tasted just gorgeous with my local heirloom tomatoes. I bought a tomato the size of my daughter's head that was a faint yellow and tinged a peachy orange on the edges. The squash was sweet and the tomato was tangy so they were a perfect pair. Sprinkled with salt, herbs and parmesan cheese, drizzled with olive oil and then browned in a very hot oven, it was the ultimate taste of summer. It was Fresh and comforting!

This recipe makes one medium size flatbread, that can serve 6.

Ingredients

1/4 of my homemade pizza dough recipe, click the link to get my recipe.
1 Small golden egg squash, sliced into thin rounds, zucchini or other squash can be used.
1 Medium organic heirloom tomato, sliced into thin rounds.
2 Tbsp extra virgin olive oil
2 Cloves organic garlic, minced or grated.
2 Tbsp dried, organic Italian herbs
Sea salt & fresh ground pepper, to taste.
1/4 Cup parmesan cheese

Directions

Preheat oven to 400 degrees F.

Roll out the dough on a floured surface, I like to keep it in a circle like a pizza.

Brush 1 Tbsp of olive oil onto the dough, spread out the garlic and top with the squash and tomato.

Brush with more olive oil on top of the vegetables, sprinkle with herbs, salt, pepper and parmesan cheese. Bake for 10-12 minutes or until the topping and crust is golden brown. Slice like a pizza and serve! Makes a great dipper for tomato soup, alongside salad or dipped in creamy egg yolk!


Sunday, June 16, 2013

Lamb Sausage Stuffed Mushrooms

These are my most favorite appetizer to make, serve or eat! They are so incredibly easy to whip up and are full of vegetables in a homemade stuffing! I have never met a person who didn't love them, and you can make them ahead of time and freeze them till you are ready to bake. They are the ultimate recipe to have in your kitchen arsenal, for sure! I use local, pasture raised lamb sausage that is spicy and delicious, it gives a great flavor to the stuffing. I also fill the stuffing with lots of traditional vegetables like onions, garlic, carrots and celery, so hearty and so healthy! Use homemade bread crumbs and some local cheeses and you have yourself a great alternative to a store bought appetizer. The stuffing is creamy and incredible, it pairs with the earthy and tender mushrooms just beautifully.

I have made them for homemade, steakhouse dinners, brunch menus, potluck bbqs or just because I wanted to have them. Every single person always asks me for the recipe and people who claim to hate mushrooms or sausage always devour them without a complaint! I actually had someone say "I could eat a whole bowl of this stuffing."

This recipe makes 9 large mushrooms, very overstuffed.

Ingredients

9 Large, white button mushroom caps, you want to pick caps big enough to stuff amply.
3 Links, local, farm raised, spicy lamb sausage, casings removed and meat crumbled, pork sausage can be substituted.
Pasture raised bacon fat, 1 Tbsp, olive oil can be substituted.
1 Tbsp pasture raised, salted butter.
1 Organic carrot, peeled and diced.
1 Organic celery stalk, diced.
1/2 White onion, peeled and diced.
2 Cloves organic garlic, minced.
1 Sprig organic thyme, leaves only, chopped finely.
1 Sprig organic rosemary, leaves only, chopped finely.
1 Tbsp organic, dried sage
1 Organic bay leaf, fresh or dried.
1 Cup homemade seasoned bread crumbs, click here to get my recipe, or organic herb stuffing mix can be substituted.
1/4-1/3 Cup homemade chicken broth, organic canned can be substituted, or milk works as well.
1/4 Cup parmesan cheese, grated.
1/4 Cup pasture raised mild cheddar, grated.
1/4 Cup organic cream cheese, softened.
1/4 Cup pasture raised, whole milk mozzarella, grated.
Few Tbsp olive oil, to drizzle over the top before cooking.
Sea salt & fresh ground pepper, to taste.

Directions

Preheat oven to 400 degrees F.

Scrape the black gills on the underside of your mushroom, I do this with a spoon and be careful not to ruin or break the natural "cup" they should scrape pretty easily, I do it over a garbage can and just dispose of them. Wipe the mushrooms off with a damp rag, don't do this till you are ready to use them. Set them up in a small baking dish so that they are all touching and keeping each other upright during the cooking process.

In a large saute pan, over medium high heat, melt the bacon fat. Cook the crumbled sausage for 5 minutes, until browned and just heated through, remove and set aside. In the same pan turn down the heat to medium and add the butter and cook the carrots, onion, celery, and garlic, salt and pepper them. Cook for 5 to 7 minutes or until they are soft and slightly browned. Add in the thyme, rosemary, sage and bay leave. Stir to combine and cook for another minute. Add in extra fat if you feel the pan is dry, I like to add butter. Next add in the bread crumbs, and add the sausage back in. Stir well to coat them with the fat and vegetables. Stir in the 1/4 cup of chicken stock just till the bread crumbs are wet and start to stick together, you can add more liquid if you feel the mixture isn't coming together, just be careful not to add to much moisture or the mixture will not stay in your mushrooms nicely. Remove the mixture from heat, transfer to a large bowl.

Add in parmesan, cheddar and cream cheeses. Mix to combine well. Taste for salt and pepper and season as needed.

Stuff the mixture into the mushrooms, mounding it up. The mixture should stay mounded nicely if it is too wet add in more bread crumbs to get a better consistency. Top each with a tiny bit of mozzarella cheese, drizzle with olive oil and bake for 20-25 minutes. The stuffing will be browned, and the mushrooms will be tender.

Remove from the oven and place on a beautiful serving platter and enjoy! We like to serve them as an appetizer or side dish!


Tuesday, June 11, 2013

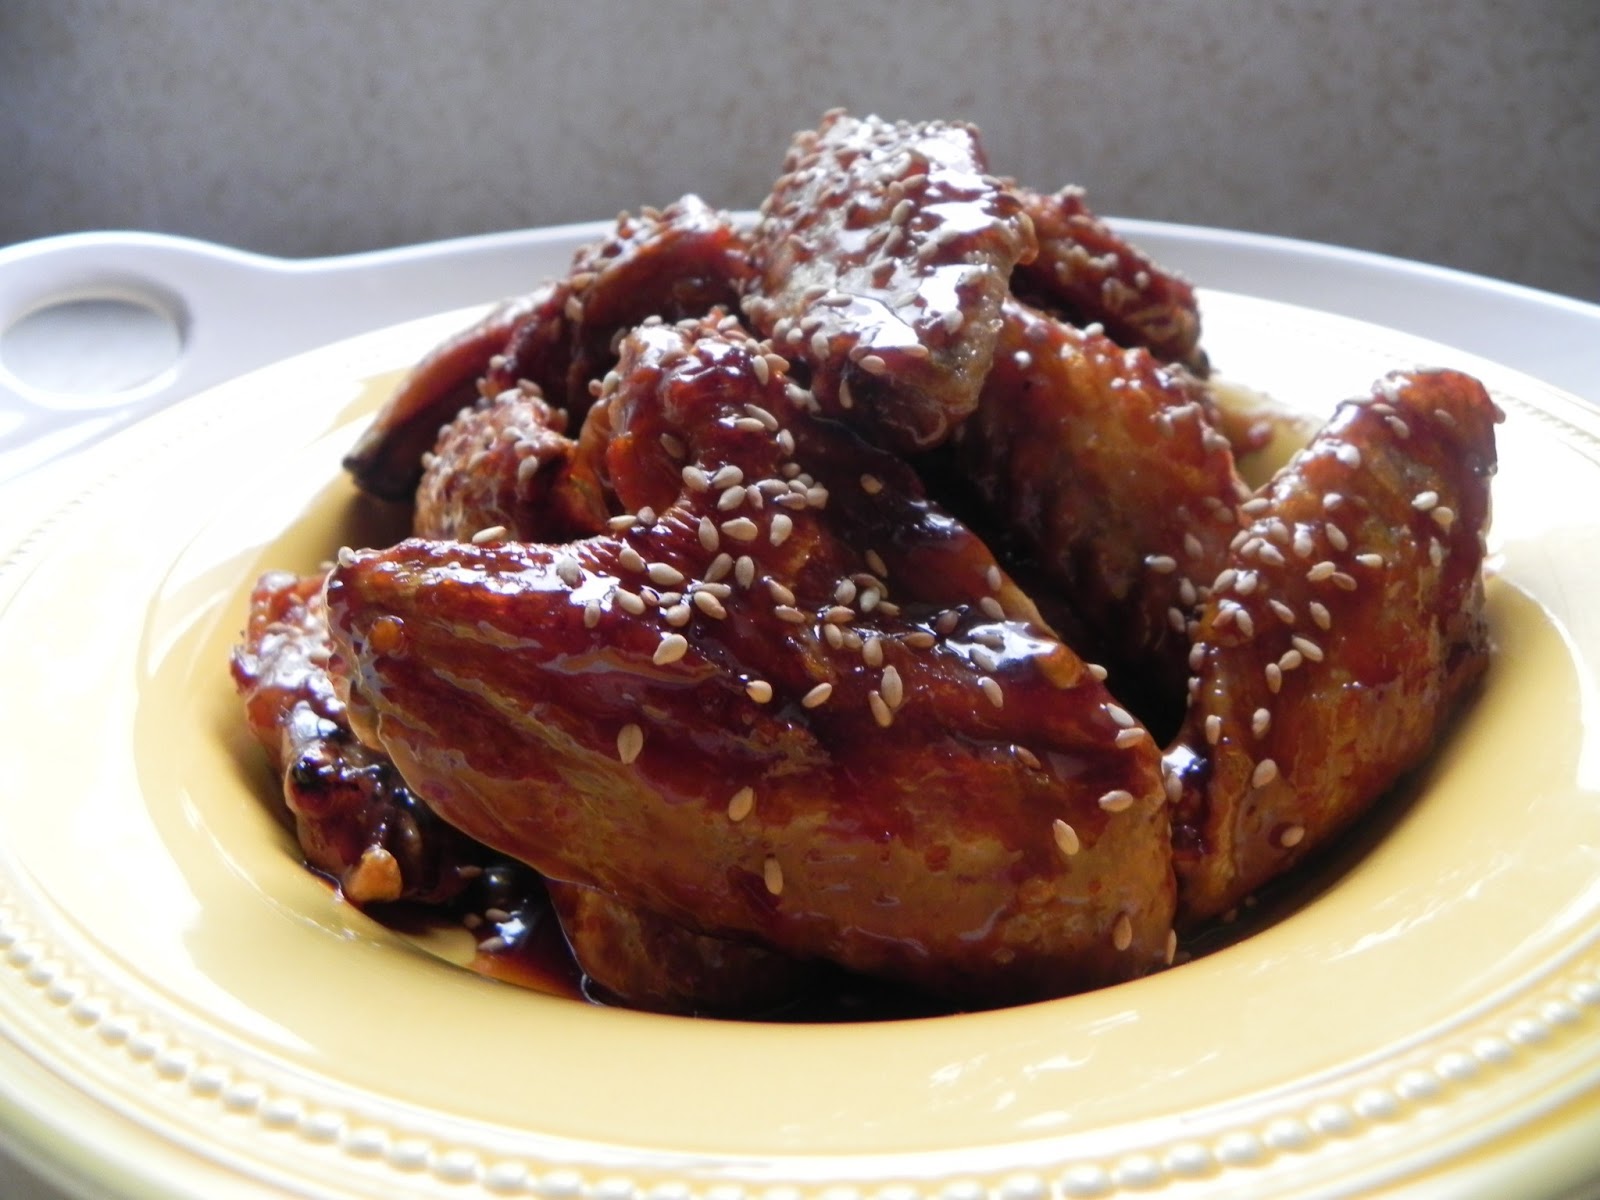
Spicy, Baked, Asian Inspired Chicken Wings

These wings are a household favorite, my husband asks for them every time I mention I am making wings. The sauce is spicy, sweet and full of unique Asian flavors. I only add a tiny bit of butter so that its healthier than traditional wing sauce and my wings are baked, not fried. They still have an incredibly crispy skin and we don't miss the frying at all. Here are a few tips for getting crispy, baked wings:


  • Bring your wings to room temperature before you bake them, this allows the heat to focus on crisping rather than bringing them up to temp first, when you put cold meats to sear or bake the heat has to work to get them up to temperature before it begins crisping and searing. Ever put a cold steak on the grill and wonder why it won't char or get a brown crust, well its because most restaurants and cooks bring their meats to room temp before cooking them. This takes about 30 minutes on a cool day, if its a very warm day don't leave them out longer than 30 mins, bacteria can grow and cause illness.
  • Pat off your wings completely with a clean kitchen towel, getting their skin dry ensures a crispy texture.
  • Brush the wings with a canola oil or other high temp safe oil. This will crisp up the skin without burning it.
  • I like to put my wings on a baking rack or broiler pan, the top part of the broiler pan has slits in it and sits raised up over another "drip pan" to allow air and heat to flow all around the wings, no more crispy top and soggy bottom.
I always cook my wings first and then toss them in the sauce, make sure to toss them hot, right out of the oven that way they will soak up all your gorgeous sauce. I have been making wings this way for years now, frying requires a lot of oil and then requires disposing of that oil. It makes a huge mess and is incredibly unhealthy. I wasn't, however, ready to give up my crispy wings so I did some test runs and have finally perfected my baking method!


This recipe makes 12 wings, which in my house, feeds 3.

Ingredients

12 chicken wings, cleaned and patted dry.
1 Tbsp Asian 5 spice powder
Garlic infused canola oil, enough to brush each wing and coat evenly, about 2 Tbsp.
Sea salt & fresh ground pepper, to taste, be careful with this because the sauce is a bit salty I used about 1 tsp for all the wings.

Sauce

1/2 bottle (22 oz) Soy Vay, all natural, hoisin, garlic sauce.
1/3 Cup orange juice, I use Simply Orange, I find fresh squeezed is not tangy enough and bitters during the cooking down process.
2 Tbsp local honey, I use Rulison buckwheat honey.
2 Cloves organic garlic, minced or grated.
1 tsp Red pepper flakes
1 Tbsp Siracha sauce or your favorite Asian hot sauce, you want to be careful to watch the sodium content of the hot sauce you use as this can make your sauce way too salty, some Asian hot sauces are very salty.
2 Tbsp organic, sweet cream butter or Earth Balance.
Sesame seeds, about 2 Tbsp, for sprinkling over the top.

Directions

Preheat your oven to 450 degrees F.

Place your wings on a broiler pan or a roasting rack over a baking sheet, you want the wings to be raised up so that air and heat can circulate all the way around them. You can line the drip pan, the bottom pan, with foil for easy cleanup, I rarely have foil so I don't usually do this, but it does make cleanup so easy.

Brush garlic infused canola oil on each wing with a pastry brush, coat them evenly. Sprinkle with Asian 5 spice, sea salt and fresh ground pepper. 

Bake for 20 to 30 mins or until they are golden brown and the juices run clear.

While they are baking place first 6 sauce ingredients into a sauce pan. Heat over high heat till they come to a boil, then reduce heat and simmer for 20 minutes to reduce by half, it will be thick and syrupy. Keep a close eye on it, checking it often because once it reduces it burns very quickly. Remove from heat and whisk in the butter till it is completely incorporated. Pour into a large bowl.

When the wings are done, immediately submerge them in the sauce and turn to coat evenly with a pair of tongs. Place on a serving platter and sprinkle with sesame seeds. Serve on your favorite pizza night or make a big salad and enjoy as a main dish!


You don't have to give up wings or wonder what is in them, make them at home and let me know what you think!

Tuesday, May 7, 2013

My Antipasto Platter

Al fresco dining is my favorite way to eat, hands down. I love restaurants with patios overlooking parks or busy streets or the ocean. I love sitting on my porch in the summertime and watching the kids ride by on bicycles or watching the bees pollinate my neighbor's flowers. We also set up dinner in the backyard so that my daughter can run around and get in and out of her pool if she wants, in between bites. The last thing you want to do in the summer is turn on your stove and slave away for hours. The weather is so nice I just want to pour a glass of wine, watch the sun set and eat a beautiful meal, I don't have to cook. In our house this means a huge platter of delicious things I find in my wanderings of farmer's markets and local stores. In Italy this is called the antipasto platter and is eaten before your actual meal. In our house its called summer, no cook dinner. We eat this way a lot and I just love perusing the co-op where I shop picking out things that will compliment each other. Sometimes the platter is centered around a fabulous cheese that I tried and just couldn't say no to, or its a locally made bread and all the things I want to eat on top of it. Whatever the inspiration, there are a few basic rules I always follow that will make a simple, yet chic, al fresco meal.


Step one: get yourself a large beautiful platter. You don't want to buy a gorgeous cheese and then plop it on a plastic plate. I love making the platter look beautiful, you eat with your eyes first. I also love that its all on one big plate that everyone can share from, it makes for a very intimate dinner and forces conversation; which I feel is what dinner is all about. You don't have to go crazy, I have a very simple white platter I use every time and it was 4$ at the Christmas Tree Shoppe.

Step two: I always pick five or six things; one or two fabulous cheeses, one decadent meat that doesn't have to be cooked, one sweet item (usually fruit), one vegetable, one marinated item, such as olives and some type of bread. You shouldn't go overboard with your selections because you want to be able to buy the very best of each item so I always say quality over quantity when making this kind of dish. Feel free to do less  items, I just wouldn't do more because then your platter ends up being overcrowded and confusing. If you are serving more than two or three people then make two platters with the six items, that are both identical and set them at both ends of the table so that two to three people are still sharing from one platter.

Step three: Assembly! My rule of thumb is to put everything together so that it looks beautiful and not a mishmash of stuff. I like to serve my marinated item in a small bowl so that the oil or marinade doesn't get all over. I like to cut everything up so that its ready to just pop into your mouth. The only thing I leave whole is the cheese because you should never cut up your cheese ahead, it loses moisture and flavor when cut, hence why pre-grated parmesan has little flavor compared to freshly grated. Plus cheese just looks so beautiful when its whole, I have a soft spot for it.

Now you are ready to make your own, with your favorite things and local specialties, or make this particular one by following my recipe below:

This platter will serve 2 or 3.

Ingredients for this particular platter

6oz Bloomsdale soft goat cheese with mold rind from Baetje Farms in MO, left whole. This cheese has won a number of awards and is produced in small batches. I usually buy local but after one bite of this at a local cheesemonger I couldn't say no, and this platter was born.
4 oz Fermin chorizo iberico, sliced, you can buy it on Amazon by clicking the link.
2 Organic pink lady apples, sliced and lemon squeezed over them to keep them from browning.
3 Slices herb roasted turkey breast, from the deli, rolled and sliced in half to make six pieces.
1 Small, sandwich size ciabatta roll.
1 Cup white bean salad, get my recipe here, by clicking the link. I made this salad for another meal and had leftovers so it became both my vegetable and marinated component in one.

Directions

Unwrap the cheese and allow to come to room temperature. Most cheese needs to be at room temp for the full flavor to come through. I leave it on the paper so it doesn't get all over all the other components on the platter. Just fold the paper back so that it still looks nice.

Arrange the meats and apples on the platter keeping them together.

In the middle place a small bowl and fill with your white bean salad.

Cut the ciabatta roll in half and drizzle with olive oil. Broil for a few minutes till it is browned. Cut a garlic clove in half and rub the hot bread with the cut end of the garlic clove, it will melt onto the bread. Sprinkle the bread with sea salt and cut into chunks, about 2 or 3 chunks per person. Place on the platter.

Lastly place on your room temp cheese and a cheese knife or spreader if needed.

Pour yourself some wine and enjoy, preferably outside with your loved ones.


After a good dinner one can forgive anybody, even one's own relations.
            ― Oscar Wilde

Saturday, April 20, 2013

Spinach, Artichoke & Roasted Red Pepper Dip

This dip didn't end up on a chip or crostini, oh no I had serious plans for this dip! I recently saw a recipe posted on Facebook by a fellow blogger, steakhouse mushroom burgers with creamed spinach topping...oh yum! I had every intention of recreating these burgers, but...I had to make a spinach, artichoke & roasted red pepper dip for a baby shower and it hit me! Topping the burgers with that!! Oh my gosh I am so glad that happened, it was heaven on a sprouted wheat bun! You can always just use the dip in the traditional way, I will give you a great crostini idea at the end of the blog that you can serve with the dip but I highly recommend getting out of your comfort zone, going crazy and putting this on everything! Scrambled eggs, turkey sandwich, grilled cheese, I could probably go on for a while here, but I won't. You came for a recipe and a recipe you shall get! My dip is slightly healthier than the traditional version because of a few things. First I like to use lower fat ingredients like low-fat cream cheese and olive oil may, which is naturally lower in fat. I also bump up the fiber and bulk by  adding more veggies than cheese so that it's a very chunky dip. You actually get very little cheese in each bite, but it's enough to still be creamy and satisfying.

                                                                                                                                                 Grass-fed, locally raised beef served on sprouted wheat buns with a healthy amount of my dip.

Ingredients

6 Oz low-fat organic cream cheese, at room temp., I use Organic Valley
1/3 Cup Cabot Creamery sharp cheddar cheese, grated, all of their profits go right to the farmer's who produce their milk
1/4 Cup parmesan cheese, grated
1/4 Cup organic, low-fat sour cream
1/4 Cup olive oil mayonaise, I use Hellman's, I know this is a big business brand but I have yet to find a brand that is better that is local or all natural, sorry folks I do have flaws!
1 Package organic, chopped, frozen spinach, thawed and drained of excess water
2 Cans, 14 oz chopped artichoke hearts, drained and chopped even smaller
2 large roasted red peppers, chopped finely, I used Divinia
1 Clove organic garlic, minced or grated
Sea salt & fresh ground pepper, to taste

Directions

Preheat oven to 350 degrees F.

In a large bowl combine all ingredients and mix well.

Put in a baking dish and bake in preheated oven for 20 minutes or until hot and bubbling.

Serve with your favorite tortilla chips, crostini* or on top of a grass-fed burger!!

*To make crostini: Cut a loaf of, local, artisan french bread into small slices, brush with olive oil, sprinkle with oregano, minced garlic, sea salt and pepper. Bake at 400 for 5 to 7 minutes or until crispy and browned. You can also use sprouted bread or whole grain bread and it's just as delicious and even more healthful!


Spinach, artichoke & roasted red pepper dip on top of my burger! Creamy and full of veggies!


Thursday, April 18, 2013

Spinach & Walnut Pesto

I am a sucker for a good pesto! I have been known to use it as a dip for chips or homemade bread, as a pasta sauce or to top a huge bowl of homemade tomato soup!

Pestos are a great way to use up very delicate herbs and greens that do not last very long in the fridge and it's super healthy! I like to make up huge batches of pesto, when basil and baby spinach are in season and then freeze it and use it all year long. You can thaw out a little taste of summer during the  winter, whenever you have a hankering. It's also a super easy way to get those leafy greens into little tummies who claim they hate them...like my two year old. I like to make some whole grain pasta and then melt some pesto over it, sprinkle with Parmesan cheese and...poof...you have a super healthy meal that kids will love!


When I make pesto I like to use the very best ingredients I can find. It's a raw sauce that will not be cooked and, therefore the things you put in it should be the best. I also like to play around with the herbs and greens I use in mine to get all different flavors and nutrient levels. Basil is a very anise flavored herb that is sometimes a little aggressive on more delicate dishes, so I like to cut that back with baby spinach which gives you an extremely healthy and lightly flavored pesto. The other component of pesto that I like to experiment with are the nuts. You don't have to use just pine nuts, which are very expensive, you can use any nut combo you like. I use walnuts the most because I think they make an incredibly rich pesto and they are loaded with omega-3's.

Pesto is a great way to use up and preserve your herbs, but you can also freeze them whole in olive oil as well. Let's talk about how to make and freeze pesto and also how to freeze herbs that you don't want to use in pesto.


Let's talk about pesto first. I like to jar some of the pesto to use right away, but it's so intensely flavored that a little goes a long way...so what to do with the rest? I have a few, flexible, ice cube trays that are designated to herb freezing only. These ice cube trays are easy to bend so they make popping out the cubes of pesto very easy. I just spoon in the pesto, about 1 Tbsp each cube place them in the freezer, wait 24 hours and then pop them out and store them in a freezer bag. They can be thawed out in about 20 minutes just sitting on the counter, zapped for a few seconds in the microwave or they can be added directly from the freezer into a hot dish to melt in, easy peasy!!


Now let's talk about the herbs that aren't going in your pesto. These can also be saved and used all year long with one easy tip...olive oil ice cubes! Yep, you just chop up the herbs you are freezing, you can do them alone or in your favorite combos and then add them to your flexible ice cube trays, pour in good quality olive oil and freeze! This suspends them in a tiny block of olive oil ice that can be thawed or used directly from the freezer the same as your pesto cubes! Genius, absolute genius! I did not come up with this idea on my own, I have seen many Facebook shares with this, but I have been using this method for a long time and thought I would share my technique with you in case you haven't seen the viral herb freezing posts.  


This recipe makes about 2 cups.


Ingredients

2 Cup fresh, organic basil leaves
3 Cups organic baby spinach leaves
1/2 Cup raw, unsalted walnuts
4 Organic garlic cloves, roughly chopped.
Sea salt & fresh ground pepper, to taste.
1/2 Cup to 3/4 cup extra virgin olive oil
1/2 Cup Parmesan-Reggiano, grated.


Directions

In a food processor add in basil, spinach, walnuts and garlic. Pulse on low till the mixture resembles wet sand.

Add in Parmesan cheese and pulse a few more times.

With the processor on low, drizzle in olive oil slowly, using only enough to make a creamy, smooth consistency. Taste for salt and pepper and season to taste.

Serve immediately or store in fridge for up to 2 weeks. Freeze any that you aren't going to use within 2 weeks.


Pesto ideas:

Pesto mayo
1 tsp mixed into 1 Tbsp mayo for a pesto mayo for sandies.

Melt over your favorite pasta and a little pasta water for a quick sauce.

Mix with hummus for a great, healthy dip for bread or chips.

Spoon over chopped tomatoes for a low-carb side dish for breakfast or lunch.

Mix into your favorite Bloody Mary mix and serve an herbed Bloody Mary for brunch.


Tuesday, March 26, 2013

Oven Baked Pork & Turkey Empanadas


I have a soft spot for, what I like to call, Colombian hot pockets; they are delicious flaky pockets filled with meat and veggies. My version is healthier than the traditional one, without sacrificing taste in any way.  Mine are baked, instead of fried and I use a combo of ground, pasture raised pork and organic ground turkey, along with a perfect combination of nutritious vegetables.  My two year old daughter absolutely loves them and they are a healthy, portable meals that are perfect for tiny hands.  They can also be personalized to fit any taste, and I love to make large batches of them at one time and then freeze them for a quick and healthy meal on a night when I don't feel like cooking or don't have time.

This recipe makes 20 empanadas, and if you have extra ones, they freeze perfectly.

Ingredients

2 Packages Goya empanada shells, 10 shells each.

1 lb Pasture raised, organic, ground turkey, dark meat.

1/2 lb Pasture raised, organic, ground pork.

1 Tbsp Goya adobo seasoning, found in the Latin American section of your grocery store.

1 tsp ground coriander

1 tsp dried oregano

1 tsp dried poultry seasoning

Sea salt and fresh ground pepper, to taste.

Olive oil, for sauteing.

1 Large onion, finely chopped.

1 Organic red pepper, finely chopped.

3 Cloves oganic garlic, minced.

1 Large,organic, red skinned potato, finely chopped.

1 Cup Goya sofrito liquid, this is in the frozen section, if you cannot find it, the jar version can also be used and can be found in the Latin American section of your grocery store.

1/4 Cup organic tomato paste

1/4 Cup green olives, chopped.

1/4 Cup organic, sulphur-free raisins

2 egg whites


Directions

In a large bowl combine turkey, pork, adobo, coriander, oregano, poultry seasoning, salt and pepper.  Mix well.

In a large heavy bottomed saute pan, add olive oil and on medium high heat, saute meats till they are browned, about 6 to 7 minutes, remove and set aside.  In the same pan add olive oil and on medium heat saute onion, pepper, garlic and potatoes for 6 minutes, add in tomato paste, liquid sofrito and meats back in and cook till the vegetables are soft, about 30 minutes.  If the mixture gets too dry, add water as necessary. When the mixture is soft, add in olives and raisins and cook an additional 3 minutes.  Remove from heat and set aside to cool completely.


Preheat oven to 400 degree F.

In a small bowl, whisk egg whites with a tsp of water.


Once mixture has cooled, line a work space with parchment or wax paper.


 Spoon 2 Tbsp of mixture onto a shell.
With a pastry brush, brush a bit of the egg white mixture around the edge of the empanada shell.


Pull the shell over top of the filling and with a fork, push down the edges to seal. Repeat for the remaining 19 shells placing the amount needed for cooking onto a pizza stone. The remaining empanadas can be frozen for later use.


Brush the, to be cooked empanadas with egg white and cook in preheated oven for 10 to 15 minutes or until golden brown.

My favorite way to serve is with a fresh squeeze of lime, sour cream and shredded cheese over top.  Buen provecho amigos!